
WordPress themes are crucial for defining your website’s aesthetic and overall functionality. Understanding how to install a WordPress theme is a fundamental skill for anyone managing a website. Whether you choose a complimentary theme from the official WordPress directory or invest in a premium design, the installation process is typically straightforward and accessible.
This guide will detail three proven installation methods: directly through the WordPress dashboard, by uploading a theme’s ZIP file, and manually using an FTP client. Each method caters to different scenarios and levels of technical comfort. With these instructions, you’ll have your new theme activated and ready for customization in a matter of minutes, significantly transforming your website’s appearance.
The WordPress dashboard method is an ideal choice for themes available in the official WordPress theme directory, which are typically free. This approach is user-friendly, requires no technical expertise, and can be completed swiftly with just a few clicks.
Begin by logging into your WordPress dashboard. From the left sidebar, navigate to Appearance → Themes. Here, you will see your currently active theme along with any other themes you have installed.
Click the Add Theme button, located at the top of the page. This action will open the extensive WordPress theme directory, offering thousands of free themes for you to explore.
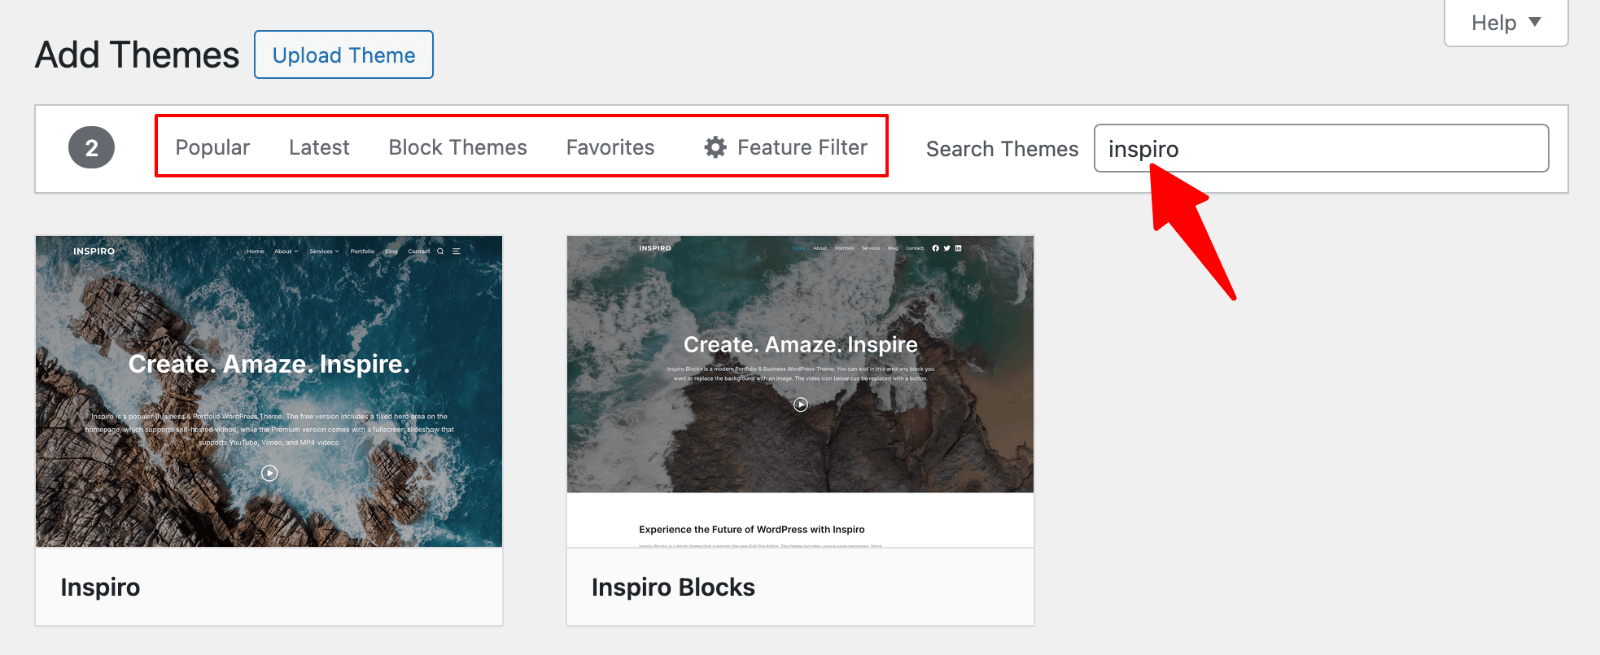
Utilize the search bar to efficiently locate specific themes. For instance, if you wish to install "Inspiro Lite", simply type “Inspiro” into the search field.
The search results will display themes that match your query. You can also browse themes by various categories such as Featured, Popular, or Latest. Additionally, the Feature Filter button allows you to refine your search based on layout, specific features, or subject matter.
When you hover over a theme thumbnail, such as the Inspiro Lite theme, two distinct options will become visible: Install and Preview.
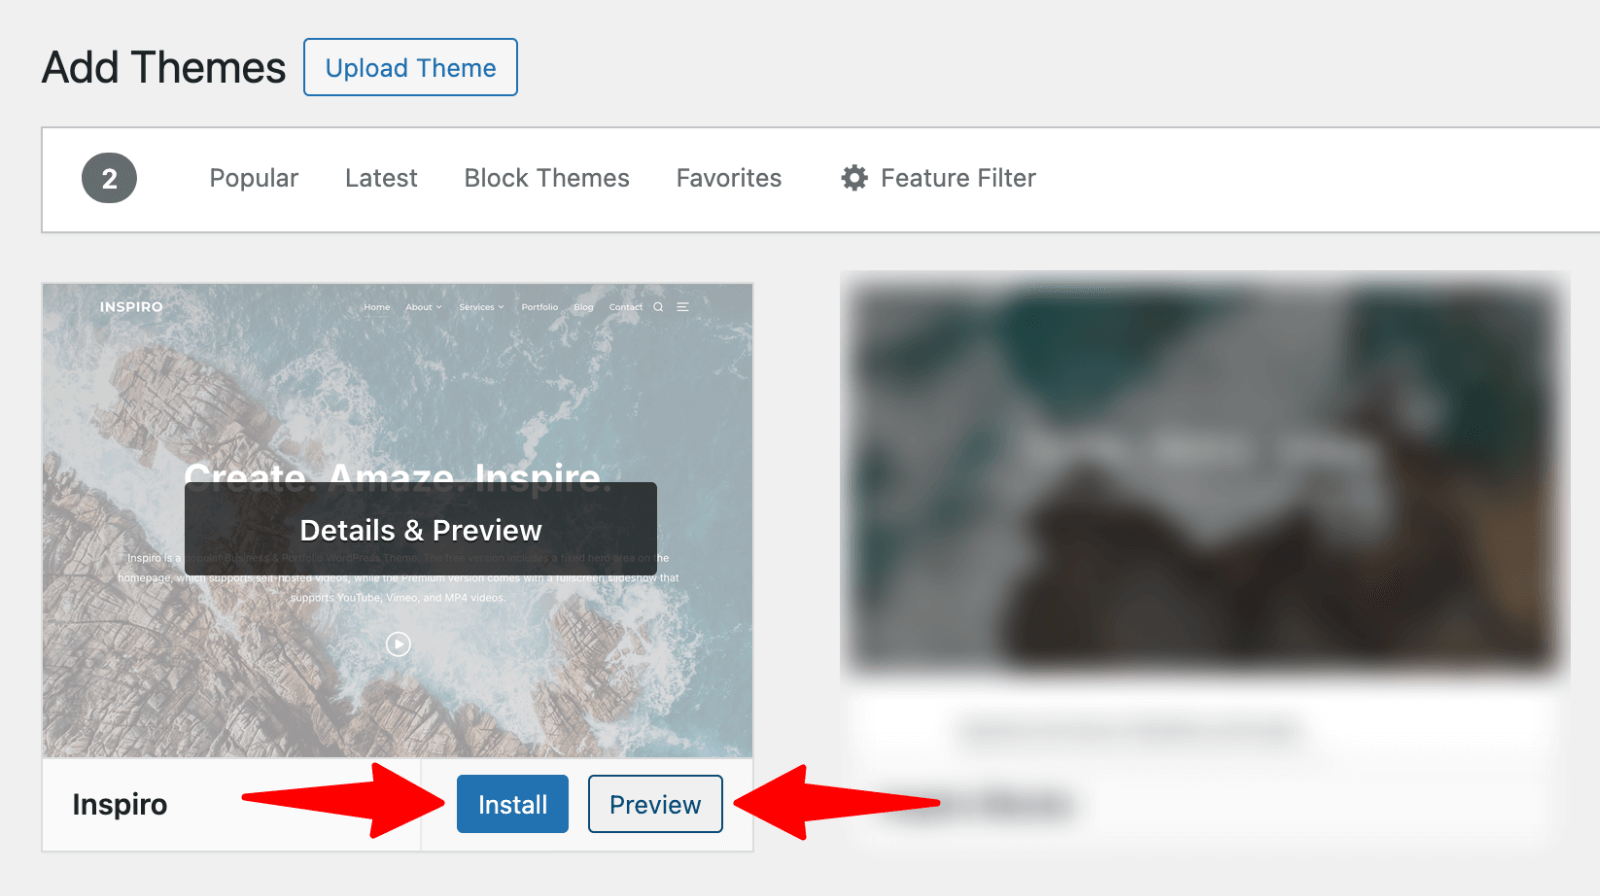
Clicking Preview allows you to see how the theme would appear with sample content. This feature is excellent for visualizing your site’s potential look before committing to an installation.
Once you are satisfied with your choice, click Install. WordPress will then automatically download and install the theme files, a process that typically takes only a few seconds.
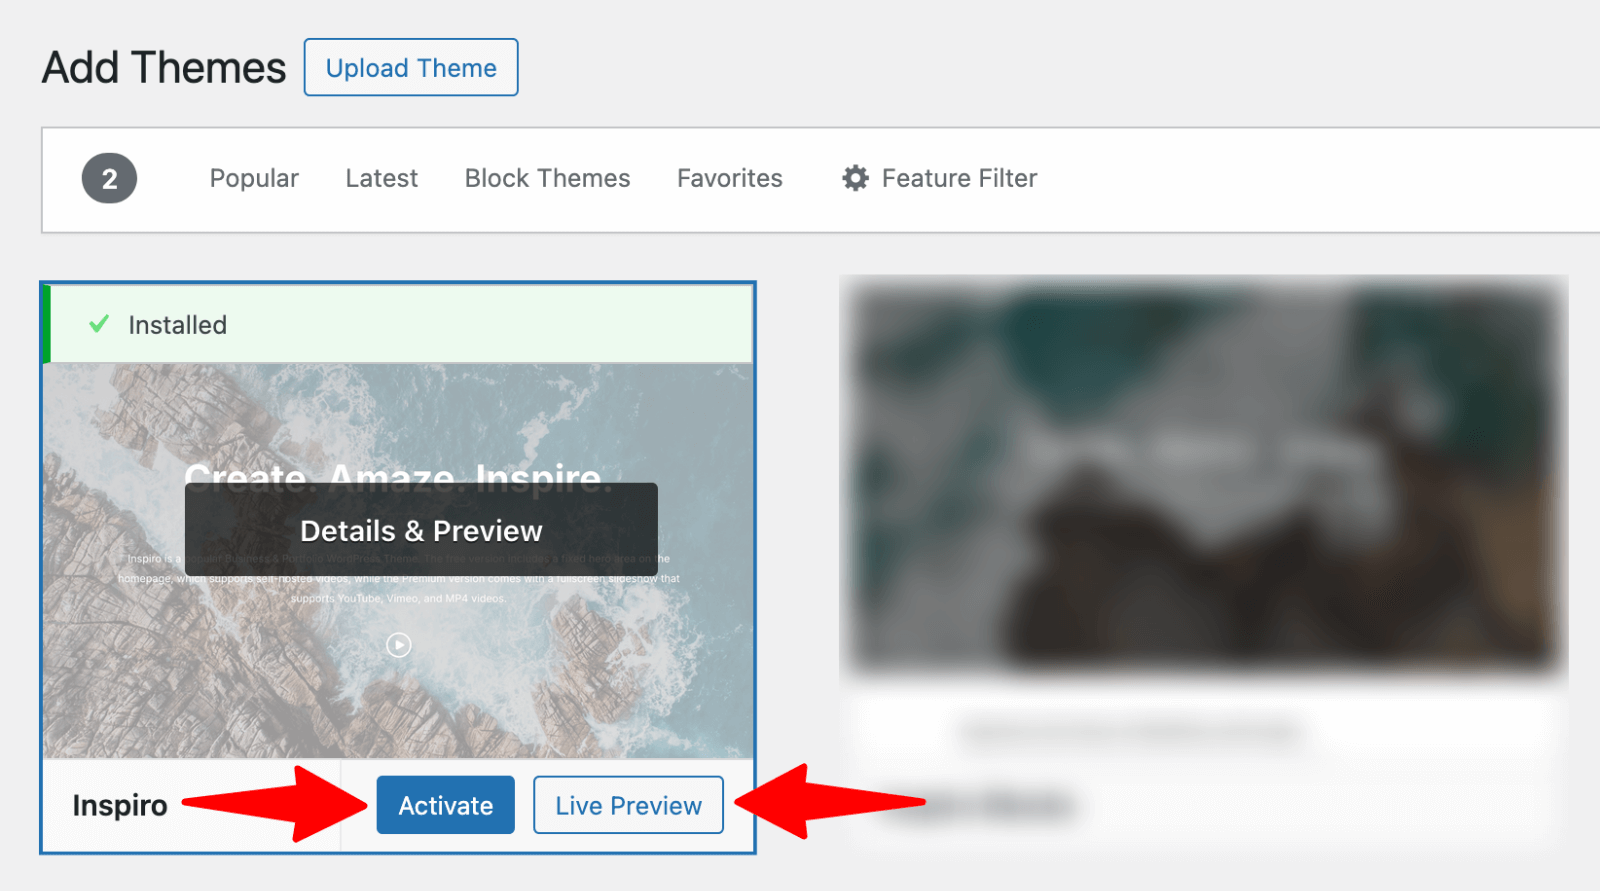
Upon successful installation, WordPress will display a confirmation message. You will then see two buttons: Activate and Live Preview.
Click Live Preview to observe how your actual website content integrates with the newly installed theme. If the appearance meets your expectations, click Activate to apply the theme and make it live on your website.
Most themes offer extensive customization options, which are accessible through Appearance → Customize. The WordPress Customizer is a powerful tool that enables you to modify various design elements such as colors, fonts, and layouts to align with your brand.
For example, a theme like Inspiro Lite provides diverse customization settings including header options, color schemes, and layout preferences. It is highly recommended to dedicate time to explore these options to achieve the optimal aesthetic for your website.
For more detailed guidance, consider learning how to fine-tune layouts, fonts, and colors effectively.
Premium themes typically necessitate a different installation approach, as they are not found within the default WordPress directory. The upload method is suitable for any theme you have acquired and downloaded as a compressed ZIP file from a theme provider or marketplace.
After purchasing your desired premium theme, proceed to download the associated ZIP file. For example, if you obtained a premium version of Inspiro, you would download its ZIP file from your account on the theme provider's platform.
Save the ZIP file to a convenient location on your computer, such as your Downloads folder or desktop, to ensure easy access during the installation process. It is important not to unzip the file at this stage, as WordPress requires the original ZIP format for upload.
From your WordPress dashboard, navigate to Appearance → Themes → Add Theme. Instead of searching the theme directory, locate and click the Upload Theme button positioned at the top of the page.
This action will present a file upload interface, allowing you to select the ZIP file of your premium theme from your computer.
Click the Browse… button and select the ZIP file containing your premium theme. Once selected, WordPress will display the filename.
Proceed by clicking Install Now to initiate the upload and installation process. The duration of this process can vary from 30 seconds to a few minutes, depending on your internet connection speed and the size of the theme file. WordPress will automatically extract the theme files and place them in the appropriate directory.
Following a successful installation, click Activate to enable your newly installed premium theme. WordPress will immediately apply the new design to your website.
Premium themes often come equipped with setup wizards, starter site options, or additional configuration settings. Many integrate seamlessly with popular page builders and offer multiple pre-designed starter site templates.
Take time to explore the theme’s documentation and the initial setup process. Many premium themes also include features to import demo content, which can help you quickly replicate the appearance of the demo site.
If you are replacing an existing design, it is advisable to understand how to change a WordPress theme without losing valuable content.
Manual installation via FTP (File Transfer Protocol) provides comprehensive control over the theme installation process and serves as a reliable alternative when other methods encounter issues. This method requires a basic understanding of technical procedures, but it becomes straightforward once you grasp the necessary steps.
First, download your theme’s ZIP file and then extract its contents on your computer. For a premium theme, this action will typically create a folder named after the theme, such as “inspiro”, which contains all the necessary theme files.
Keep this extracted folder readily accessible, as you will be uploading its entire contents to your web server shortly.
Download and install an FTP client to facilitate file transfers. FileZilla is a widely recommended option due to its free availability and user-friendly interface.
FileZilla features a split-screen layout, displaying your local computer files on the left panel and your server’s files on the right panel, simplifying the transfer process.
You will need specific FTP credentials to connect to your server. These can usually be obtained from your hosting provider or found within your hosting control panel. The essential credentials include:
Input these credentials into your chosen FTP client to establish a connection.
Open your FTP client, such as FileZilla, and enter your gathered credentials into the Quick Connect bar located at the top. Click Quickconnect to establish a connection with your server.
Once connected, navigate to your WordPress installation folder, which is commonly named public_html or corresponds to your domain name.
In the server’s file browser panel (on the right side of your FTP client), navigate to the wp-content/themes/ directory. This particular folder houses all the themes currently installed on your WordPress website.
Drag and drop your extracted theme folder (e.g., “inspiro”) from your local computer’s panel to the themes folder on the server. The FTP client will display the upload progress at the bottom of the screen.
After the upload is complete, return to your WordPress dashboard and go to Appearance → Themes. Your manually uploaded theme should now appear in the list of available themes.
Hover over the theme thumbnail and click Activate to enable it on your website, making it the active design.
If you are unsure which theme best suits your needs, it is beneficial to explore how to choose a WordPress theme that aligns with your specific goals and requirements.
While installing a WordPress theme is a crucial initial step, the post-installation process is equally important to ensure your website operates optimally and presents a polished, professional appearance.
Every professional theme offers a range of customization options, typically accessed via Appearance → Customize. Common settings you will encounter include:
It is recommended to spend time exploring each customization panel. Many themes, both free and premium, provide live preview functionality, allowing you to see changes in real-time before publishing them to your live site.
While themes dictate design, plugins extend your website’s functionality. Consider integrating these popular additions based on your site's needs:
Install plugins that directly support your website’s objectives. However, be mindful of installing too many plugins, as an excessive number can potentially impact your site’s loading speed and overall performance.
For more insights, discover a comprehensive guide to the best WordPress plugins suitable for various website types.
Your website’s visibility in search engine results is significantly influenced by both the quality of its content and its technical performance. After installing your theme, consider these optimization steps:
Explore advanced techniques in a detailed guide on WordPress SEO best practices.
It is crucial to test your newly installed theme across a range of different web browsers and devices to ensure consistent performance and appearance:
While most professionally developed themes undergo rigorous browser testing, custom modifications or third-party integrations can sometimes introduce compatibility issues.
If you are switching from a previous theme, it is essential to review your existing content thoroughly to ensure a smooth transition: